Miro Process Mapping: Step-by-Step Guide for Business Analysts
Introduction
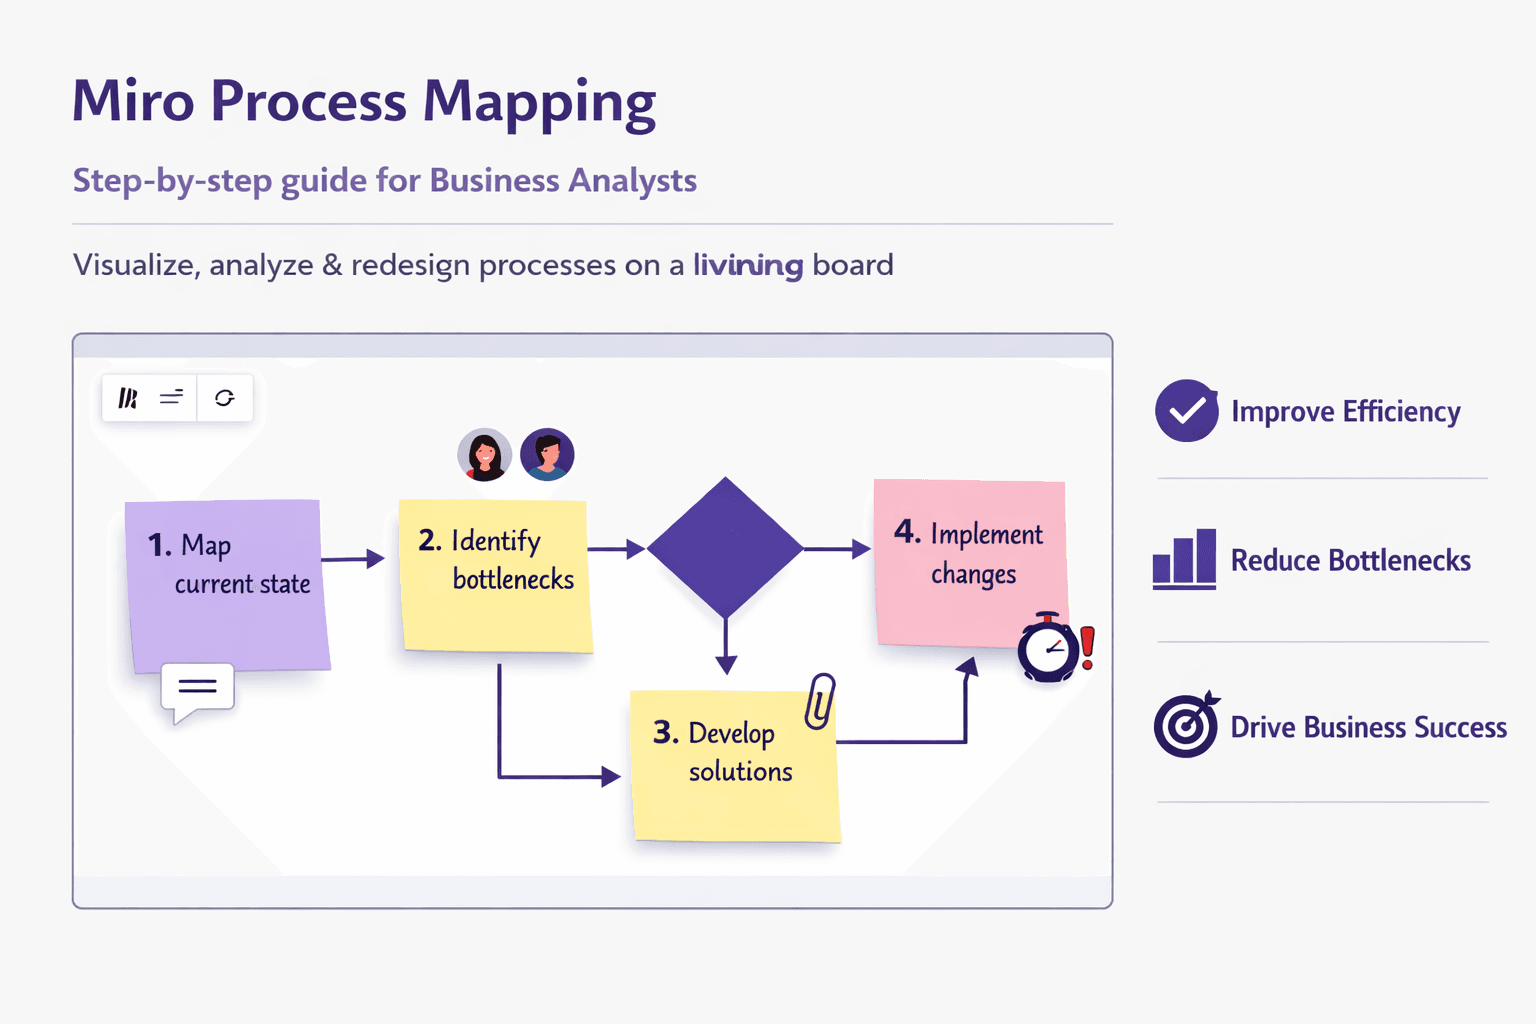
Miro process mapping is the practice of using Miro’s whiteboard platform to visualize, analyze and redesign business processes. Instead of a static flowchart buried in a Word doc, you get a living board: step-by-step flows, decision points, handoffs, attachments, screenshots, and comments — all in one place. That matters because process clarity reduces rework, speeds automation, and makes onboarding easier. Teams can see who does what, where delays happen, and which steps are ripe for automation.
Who this guide is for: business analysts, consultants, ops managers, process owners, and anyone in an automation-adjacent role who needs to document and improve workflows. If you run workshops, hand off SOPs, or maintain runbooks, this will be practical.
What you'll learn: recommended Miro templates and board setup, a step-by-step mapping workflow (AS-IS to TO-BE), collaboration and workshop tips, integration and automation ideas (Jira, Confluence, Slack, Zapier, APIs), plus governance and measurement advice. You'll also get real-world examples — like onboarding a new customer, handling a refund request, and automating a recurring finance task.
Why Use Miro for Process Mapping
Short answer: it’s visual, social, and fast. Here’s the case in detail.
-
Visual, infinite canvas for end-to-end process visualization
A single Miro board can hold a 20-step process or a company-wide map with dozens of swimlanes. You’re not constrained by page size. That matters when you need to show context — upstream triggers, downstream reports, and the data artifacts that travel between systems. -
Real-time collaboration and remote workshop facilitation
Multiple participants can edit live, add sticky notes, vote, or comment. For distributed teams, that means you can run a 60–90 minute mapping session with stakeholders in three countries, capture agreements, and export the board immediately. -
Built-in templates, libraries and easy sharing vs traditional tools
Compared to Visio or static PDFs, Miro makes iteration quick. Templates get you 80% of the way there (Swimlane, Flowchart, SIPOC, Customer Journey). Libraries let you standardize shapes and icons across boards so your process maps stay consistent.
Real-world example: A payments team at a mid-size fintech used Miro to map chargeback handling. They created swimlanes for Customer Support, Fraud, Payments Ops, and Legal, then iterated in a 2-hour workshop. After mapping AS-IS and identifying two unnecessary manual handoffs, they automated a rule-based triage that cut resolution time from 5 days to 36 hours. The visual artifact in Miro became the single source for training and the compliance audit.
Getting Started: Setup, Templates, and Tools
A few upfront choices stop mess later.
-
Account setup and permissions
Use team-based workspaces. Create a "Process Library" team or project for all official maps. Set board permissions depending on audience: view-only for broad distribution, edit for working sessions. Use groups or SSO (Okta, Azure AD) to manage access. -
Board structure, frames and naming conventions
Use frames as your "pages." A single process can have multiple frames: overview → AS-IS → TO-BE → Risks & Actions. Naming convention example:- Board title: "ProcMap — Customer Onboarding — Global"
- Frame names: "01 Overview", "02 AS-IS", "03 Analyze", "04 TO-BE", "05 Actions" Prefix with numbers to preserve order, and include a version tag when you publish (e.g., v1.2).
-
Recommended Miro templates and custom libraries for process mapping Start with these templates in Miro:
- Swimlane Diagram (for roles and handoffs)
- Flowchart (simple decision logic)
- SIPOC (Supplier, Input, Process, Output, Customer — great for scoping)
- Customer Journey Map (when processes are user-facing)
- BPMN-style set (if your team expects standard notations) Build a custom icon library for your organization: payment gateway icons, internal system names (CRM, ERP), and common artifacts (forms, emails, reports). That makes maps instantly recognizable.
-
Essential shapes, swimlanes, connectors and keyboard shortcuts Use rectangles for tasks, diamonds for decisions, and thin lines for information flow. Swimlanes make ownership explicit. Call out system interactions with a different color or an icon.
Useful shortcuts (Windows / macOS):
- Duplicate: Ctrl/Cmd + D
- Pan: hold Space
- Zoom to fit: Shift + 1
- Group: Ctrl/Cmd + G
- Bring to front/back: Ctrl/Cmd + ] / [
- Quick sticky note: N
Pro tip: build pre-formatted cards (task template, decision template, data artifact template) and save them to a board library. That saves time during workshops.
Step-by-Step Process Mapping Workflow in Miro
Use a repeatable workflow. This section gives a practical playbook.
1) Define scope, objectives, stakeholders and process owner
Start with a one-frame "Scope" card. Be brutal: limit the scope to what you can analyze in a single session (often a subprocess or an end-to-end process capped to a start and end event). Document:
- Objective: why we’re mapping (reduce cycle time, reduce errors, prepare for automation)
- Start trigger and end state (e.g., "Customer fills sign-up form" → "Customer has active account")
- Stakeholders: list names, roles, and one-line responsibilities
- Process owner: who’s accountable for the process after mapping
Example: For an invoice dispute process:
- Objective: cut dispute resolution time by 40%
- Start: customer submits dispute form
- End: dispute closed with root cause logged
- Owner: Billing Ops Manager, Sandra Kim
2) Map the current (AS-IS) process using swimlanes and decision points
This is where the sticky-note therapy begins.
How to run an efficient AS-IS capture:
- Create swimlanes for roles/systems (Customer, Customer Support, Finance, ERP).
- Add a start event and end event.
- Use 3–5 minute rounds: each stakeholder adds the steps they perform as sticky notes or cards.
- Use diamonds for decision points and label possible outcomes.
- Add timestamps or typical duration estimates to each step where you can (e.g., "CS triage — 2–4 hours", "Finance escalate — 1–3 days").
- Capture handoffs as arrows and note the artifact passed (e.g., "invoice PDF", "ticket ID", "reconciliation report").
- Call out pain points inline with red sticky notes.
Quick example (refund flow):
- Customer requests refund (Customer)
- CS validates order and policy (Customer Support) — Decision: valid? Yes/No
- Finance issues refund (Finance)
- Payment gateway refund processed (Payment System)
- Customer notified (Customer Support)
If you have recordings of actual sessions or screen walkthroughs, now’s the time to attach them. Lyren AI can process these screen recordings to extract the step-by-step actions and even generate preliminary flow diagrams you can import to Miro. That’s a neat shortcut when subject matter experts don’t want to type out every click.
3) Identify pain points, handoffs and information artifacts
Don't assume every bottleneck is obvious. Use structured prompts:
- Where do items wait the longest?
- Which steps are manual file transfers or copy/paste?
- Which steps require rework or have error-prone checks?
- Which approvals are duplicated?
Mark issues with a color code:
- Red = blocker (high impact)
- Orange = friction (medium)
- Yellow = curiosity (low)
Also map artifacts: attachment names, fields that must be copied between systems, email templates, spreadsheets. Those are automation gold. Example: If support copies an "Order ID" from email into a finance system manually, that’s a low-hanging automation win.
4) Design the future (TO-BE) process and document changes
You don’t need a perfect TO-BE on the first pass. Focus on improving handoffs and reducing wait states.
Steps:
- Copy your AS-IS frame to TO-BE frame (duplicate the frame).
- Use a different color set for TO-BE so it’s visually distinct.
- Start with high-impact changes first (e.g., remove duplicate approval). Use quick experiments: "If we auto-validate orders with these three rules, we can skip manual triage 60% of the time."
- Call out automation options: rule-based automation (Zapier, Power Automate), API lookups, RPA for legacy screens, or deeper system changes.
- Include an implementation plan with owners and a rough timeline (2-week quick wins, 3-month bigger changes).
Example TO-BE for the refund case:
- Auto-validate refund eligibility via API to order system (remove manual step)
- Generate refund command to payment gateway via webhook
- Create audit event in Confluence/Consolidated ledger
- Notification flow to customer automatically triggered
Document change rationale inline: “Remove manual triage — save ~3 hours/week per CS rep; expected 50% fewer human errors.”
Integrations, Exports and Automation
Miro is good for visual work, but your processes live across systems. Here’s how to connect the dots.
Connect Miro with Jira, Confluence, Slack and other tools for traceability
- Jira: Create cards from sticky notes or link Jira tickets to process steps. That way a decision in a map links to an epic or story in Jira. Use Miro’s Jira integration to embed issue cards and update statuses.
- Confluence: Embed the Miro board in a Confluence page so stakeholders can view and comment without leaving documentation. Confluence becomes your long-form SOP while Miro stays the interactive diagram.
- Slack and Teams: Post board snapshots or notifications when a board is updated. You can also trigger a board creation when a new project launches.
- Azure DevOps, Asana, Trello: Many teams use Miro cards to seed backlog items.
Example: After a mapping workshop, a BA can convert action sticky notes into Jira tickets directly from the board. That keeps decisions traceable and prevents lost actions.
Export options: CSV, PDF, PNG and how to import into BPM tools
- Export PDFs or PNGs for stakeholder reports or audit artifacts.
- Use CSV export for sticky note content (useful if you want to move a list of actions into a spreadsheet or backlog).
- For structured BPM tools, you may export diagrams via the Miro REST API as JSON and then transform them into the target format. Many BPM tools accept CSV or have their own import utilities; the API route gives you the most control.
Practical note: Miro doesn’t directly export to BPMN XML out of the box. If you need BPMN, use a two-step approach: export structured data with the API, transform to BPMN elements using a small script (Python), then import into tools like Camunda or Signavio.
Automate routine updates using Miro apps, Zapier and APIs
- Zapier examples:
- When a new Jira issue is created, add a sticky note to the "Actions" frame in Miro.
- When a Confluence page is updated, post a snapshot to Slack and create a comment on the Miro board.
- Miro apps & SDK:
- Use the Miro Developer Platform to build small apps that create standard process elements (e.g., "Insert RACI" plug-in).
- Webhooks: listen for board updates to trigger external workflows. For example, when an action item gets a status "Done" in Miro, fire a webhook to mark the corresponding Jira issue done.
- API example (Python pseudo-code to create a rectangle):
# Minimal Miro API example (pseudo)
import requests

url = "https://api.miro.com/v2/boards/{board_id}/widgets"
headers = {"Authorization": "Bearer YOUR_TOKEN", "Content-Type": "application/json"}
payload = {
  "type": "sticky_note",
  "text": "Follow-up: Update refund rule",
  "x": 100,
  "y": 200,
  "style": {"fillColor": "yellow"}
}
r = requests.post(url, headers=headers, json=payload)
print(r.status_code, r.json())
That small snippet shows how to programmatically add action items from other systems.
Real-world automation example: A retail operations lead used Zapier to create a Miro sticky note whenever a customer complaint ticket hit a certain severity in Zendesk. The ops team reviewed those notes weekly and flagged process changes. That created a steady feedback loop from frontline data to process improvement.
Running Effective Workshops and Collaboration
Mapping sessions are where the magic happens — but also where things go sideways fast. Here’s how to run them well.
Facilitation best practices: agenda, roles, timers and whiteboarding techniques
-
Agenda (sample 90-minute session):
- 5 min — Objective and scope
- 10 min — Quick walkthrough of current artifacts (SOPs, recordings)
- 35 min — AS-IS capture in swimlanes (fast sticky rounds)
- 20 min — Identify pain points and quick wins
- 15 min — Assign actions and next steps
-
Roles:
- Facilitator: runs the session, keeps scope
- Scribe: tidies the board in real-time (or use Lyren AI to generate notes from recordings)
- Timekeeper: enforces the agenda and timers
- Decision owner: a stakeholder with authority to make trade-offs
-
Use timers: Miro has a built-in timer and voting tool. Set clear timeboxes for each round (3–5 minutes per sticky round keeps things moving).
-
Whiteboarding techniques:
- Use color-coded sticky notes for different input types (facts, assumptions, questions).
- Encourage short text on each sticky; long sentences make maps unreadable.
- Cluster similar items and label clusters with a short title.
Using voting, comments and live polling to prioritize changes
After you map pain points and potential solutions, use voting to prioritize. Give each participant 3 votes. Poll for what to tackle in the first 30 days vs 90 days. Voting forces trade-offs and reduces long debates.
Use comments to capture nuance without cluttering the main flow. Tag people in comments (@Sandra) to create owned actions.
Capturing decisions, action items and assigning follow-ups in-board
Don’t leave action items as transient notes. Create a dedicated "Actions" frame and convert sticky notes into checkable cards that include:
- Owner
- Due date
- Acceptance criteria
- Link to supporting documents (Confluence page, Jira ticket)
Tip: When you convert a sticky to a Jira issue (via plugin), paste the Jira issue link back into the card so the board remains a living dashboard.
Best Practices and Common Pitfalls
You’ll save time later if you set a few guardrails now.
-
Maintain a process library and version control for reuse and governance Use a central workspace called "Process Library." Store canonical maps there and enforce a version naming scheme: "v1.0 — Published", "v1.1 — Draft", etc. If you need stricter governance, export PDFs into a document repository with approval metadata.
-
Naming standards, clear legend and process metadata for clarity Every official map should have a header: process name, owner, last updated, version, and scope. Include a legend for colors, shapes and system icons. Future you will thank present you.
-
Avoid over-detailing maps; focus on handoffs and decision logic People over-map. You don’t need every minute click. Map the decision points and handoffs that cause delays or errors. If you must capture UI-level steps for training, store them as a separate "SOP" frame or use Lyren AI to generate step-by-step screen instructions and then link that SOP from the main flow.
-
Measure success: cycle time, error rates and automation opportunities Define 2–3 metrics tied to the objective. Examples:
- Cycle time (start → finish) — aim for X% reduction
- Error rate or exceptions per 1,000 transactions
- Touchless rate (percent of cases handled without human intervention)
- Number of manual handoffs reduced
Common pitfalls:
- Inviting the entire organization to a mapping workshop — too many cooks. Keep the working session to core stakeholders, but solicit broader inputs asynchronously.
- No owner for action items — actions languish. Assign an owner with a due date immediately.
- Too many details on the diagram — split into overview + deep dive frames.
- Relying on a static export as the canonical source — maintain the living board as the source of truth.
Practical Examples and Use Cases
Concrete examples help make this real.
Example 1 — Customer Onboarding (SaaS)
- Scope: Trial sign-up → Active subscription
- AS-IS issues: duplicate verification emails, 24–48 hour manual license assignment
- TO-BE: Auto-assignment via API after email verification; send a personalized welcome flow. Expected impact: reduce onboarding time from median 2 days to <1 hour; increase trial conversion by 8%.
- Implementation: add webhook from auth system to CRM; Zapier flow that creates onboarding tasks; QA for 2 weeks.
Example 2 — Invoice Dispute (Payments)
- Scope: Dispute filed → Settlement / Close
- Pain points: manual PDF uploads, missing data fields forcing re-asks, approval chain variance across regions
- Automation candidate: pre-fill dispute form with order metadata via API, route regional exceptions to local finance queue automatically.
- Metric: reduce days to close from 5 to 2.
Example 3 — HR New Hire IT Provisioning
- Scope: HR sends offer accepted → IT assigns laptop and accounts
- Pain points: HR emails IT; IT manual ticket filling
- Quick win: create a standardized form in HRIS that triggers a Jira ticket to IT with required fields. Save 2–3 hours per hire.
For documentation-heavy workflows, Lyren AI can be a force multiplier. Record an HR admin provisioning the accounts, feed the recording to Lyren AI, and get a draft SOP plus a generated flow diagram. Import that into Miro and use it as your TO-BE implementation checklist.
Checklist to Get Started
Use this checklist to run your first Miro process mapping project.
- Create a Process Library workspace and standard board template
- Define scope and owner for the process you’ll map
- Choose a template: Swimlane for cross-team handoffs, Flowchart for decision logic
- Invite core stakeholders (max 6–8 for a live workshop)
- Run an AS-IS capture session (60–90 minutes)
- Mark pain points and vote on top 3 priorities
- Draft TO-BE with owners and quick wins (2–4 items)
- Convert actions to Jira/Backlog or create a "Next Steps" frame with deadlines
- Export a PDF snapshot and embed board in Confluence for the broader audience
- Schedule a follow-up review in 2–4 weeks to measure early impact
Conclusion
Miro process mapping gives you a fast, collaborative way to go from fuzzy email threads to a clear process with ownership, measureable outcomes, and an implementation plan. You’ll get better buy-in because stakeholders see and edit the map together. You’ll find automation opportunities faster because artifacts and handoffs are explicit. And when you combine Miro with tools like Jira, Confluence, Zapier and Lyren AI — which can turn screen recordings into step-by-step docs and diagrams — the heavy lifting of turning processes into repeatable, trainable workflows becomes a lot less painful.
Actionable next steps:
- Pick a single process that’s small but painful (onboarding, refunds, a repeated manual reporting task).
- Run a 90-minute Miro mapping workshop with the core team.
- Export action items to your backlog and schedule a 2-week pilot for one quick win.
- If you have screen recordings of the current process, try Lyren AI to auto-generate documentation and a starter flow diagram you can drop into Miro.
You don’t need to map everything at once. Start with the parts that cause the most wasted time and iterate. Miro makes the work visual, social and quick. The rest — ownership, measurement, and follow-through — is what actually moves the needle.